mei 172015


DynamoOrigineel

Original dynamo removed from engine

Because the above dynamo, mounted to my engine, was originally from a XK120 I needed to look for the correct one.

This dynamo has a brass identification plate with the following information:
Lucas 22452B, GC51, C45PVS/5, 12V, 53

The dynamo I needed should have the following numbers:
Lucas ,22462B, GC51, C45PVS/5, 12V, 56

An other XK140 restorer in my neighborhood offered me a deal I couldn’t refused.
Exchange mine xk120 dynamo for a correct, fully restored, xk140 dynamo and give him a small reimbursement for the parts he used for the restoration.

DynamoParts

All parts needed for rebuilding the dynamo

All separate parts are again sandblasted and pained black so they all look again as new.
To prevent rust, and make it easier to remove them in the future, the bolts are also painted black and mounted with a little bit tectyle.

DynamoMounted

Dynamo and engine brackets mounted on the engine

 Posted by at 14:05
nov 302014
 

After I received the engine block from the revision company I started to remove all external rust. The dirt and crease was already removed before it went to this company. The outside of the block can now be sprayed with special engine paint (MOTIP engine paint black gloss) which can withstand 150 degrees.

Engine Painted

Due to experience from other XK restorers (replaced freeze plugs came loose) I decided to leave the freeze plug in place because they still look and feel very thick (it was not possible to make dents in them with a hammer). On the original block there where also no signs of leakage. The plugs didn’t show any damage/rust when inspected from the inside (via water channels)

The basis for the engine block is now finished and we can start with the following items (which will be handle in separate parts):

 Posted by at 16:08
jul 022014
 

Cilinder Head

After all valves where removed and cleaned it was clear, that from the to heads (24 valves), a good set of valves could be combined. Some of the valves show corrosion damaged and can’t be used anymore. The corrosion in the water ports are not to bad and can be left as they are now.

CilinderHeadTop

CilinderHeadBottomCilinderHeadNumber
One tappet guide should be replaced because it is cracked (became visible  after cleaning)

Because one of the mounted camshafts (outlet) where from a XK120 (less valve lift) I bought an other one from a jaguar MK2 (C13081) Together with the mounted inlet valve is C13080 we have a matched set again.

Cilinder Block

After removing all main bearings and the crankshaft we could start removing the pistons.
Because the block has not be moved for over 46 years this was not a easy job. The first three pistons could be removed quite easily but the last three where deadlocked. After I applied penetrating oil and wait a couple of weeks, I managed to knock them one by one loose with a block of wood and a heavy hammer.

One of the six cylinder walls was badly damaged by corrosion.

All parts needed to rebuild the head and block are thoroughly cleaned and sorted, ready for the machinery.

 Posted by at 11:53
jun 102014
 

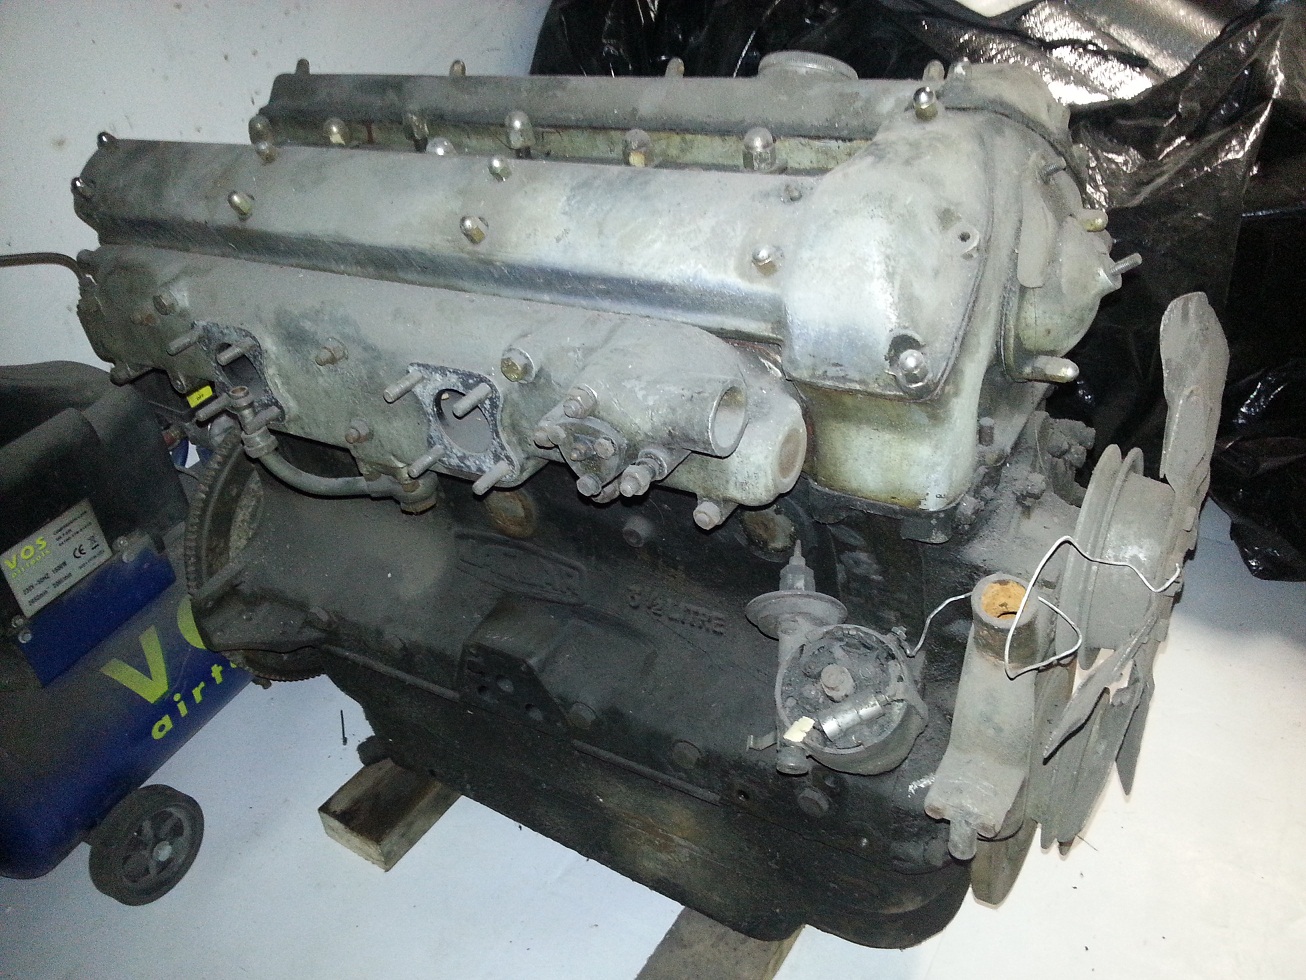
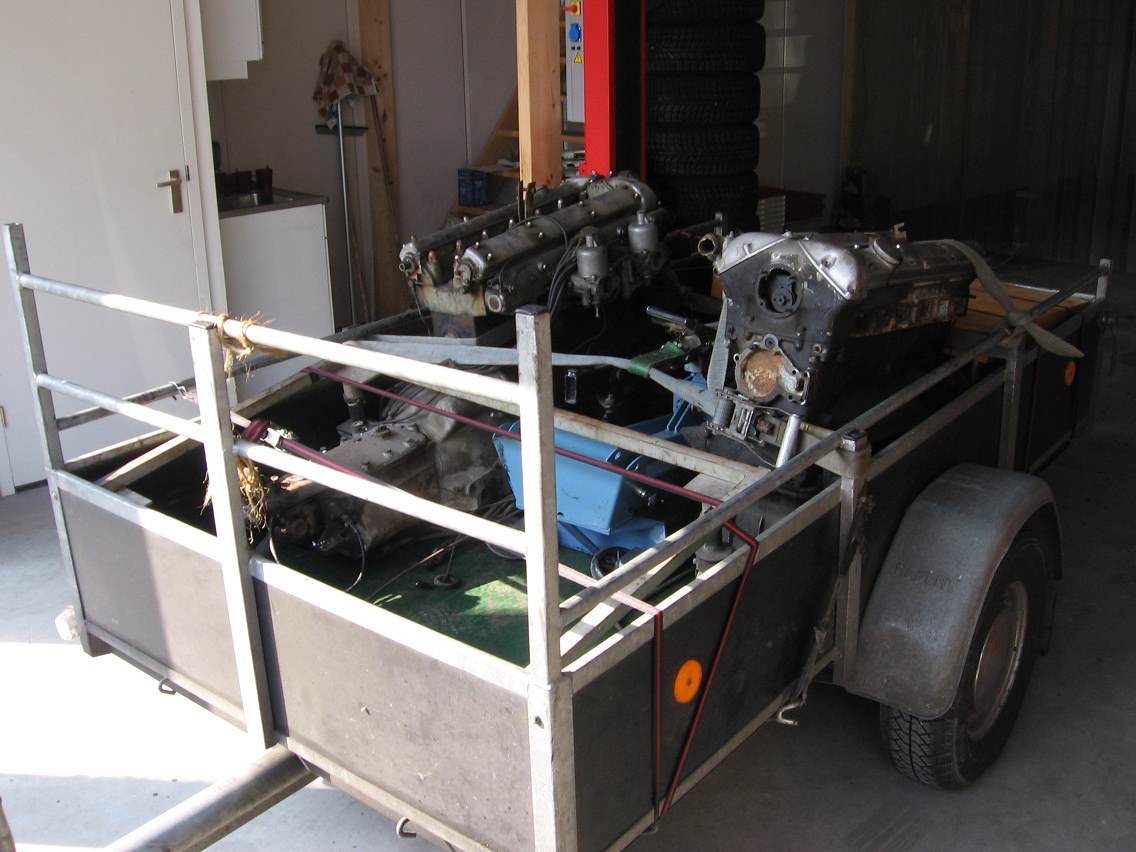
I started with the Xk140 block with the Xk120 head.EngineFrontDirty

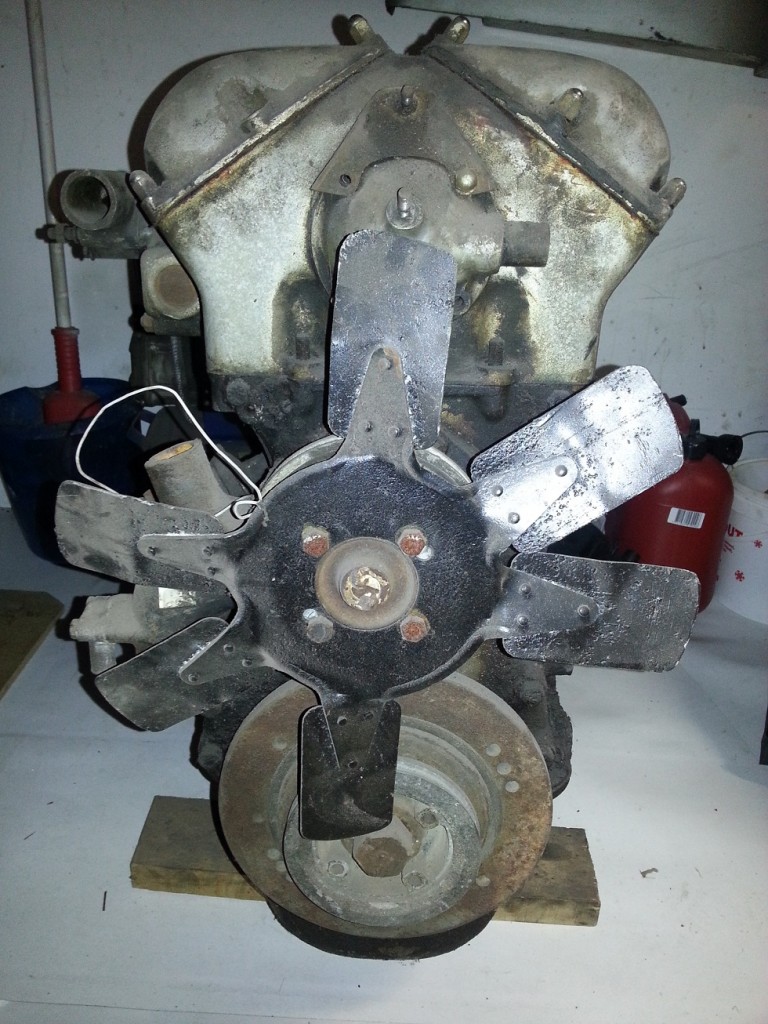
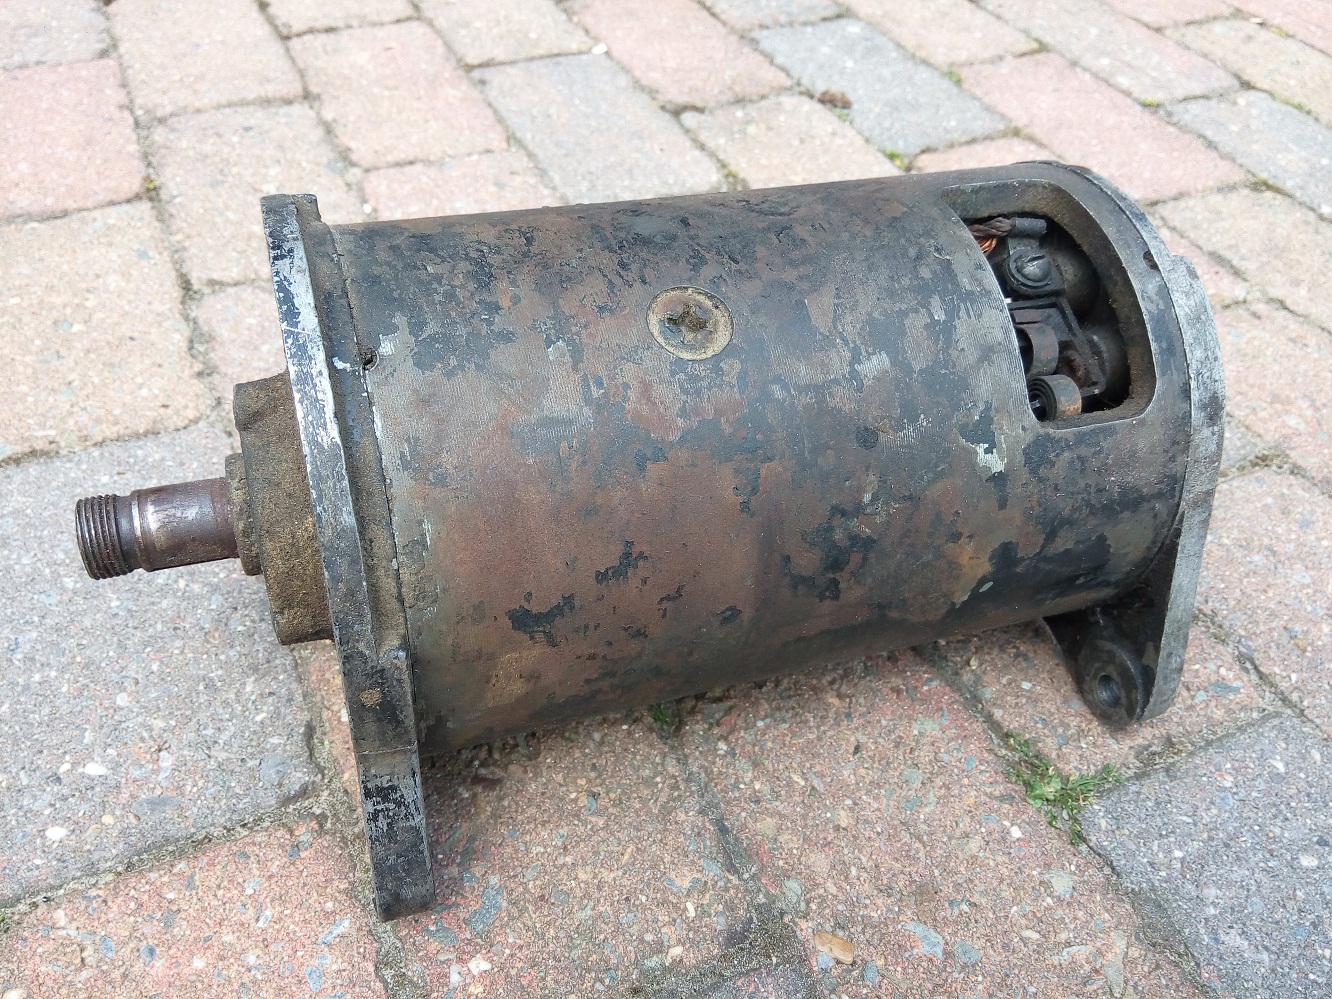
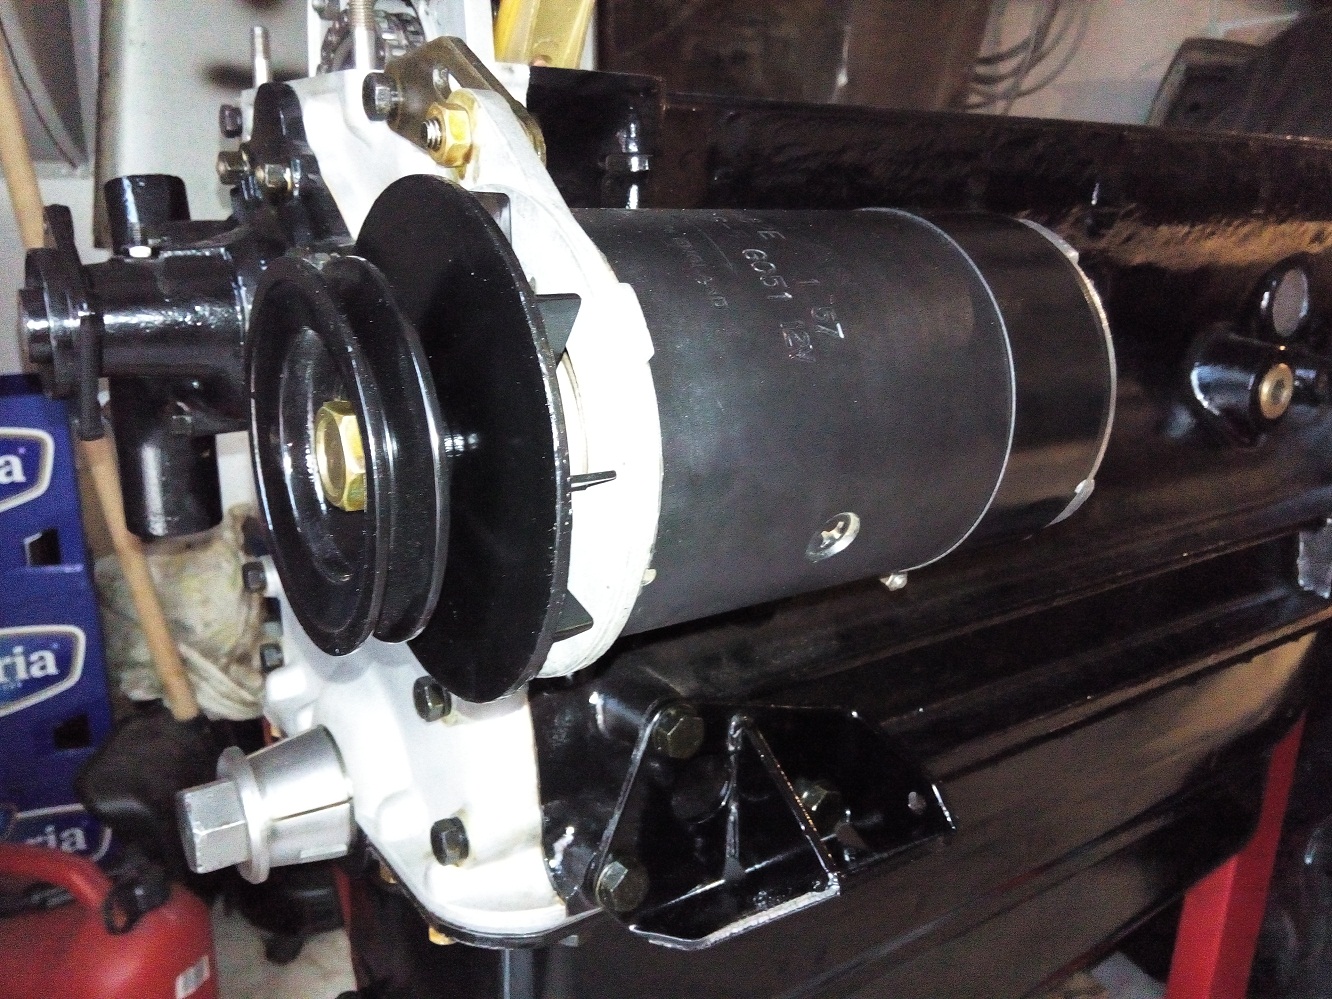
The water pump, pulley and crankshaft damper are correct and can be reused for assembly of the original XK140 engine.

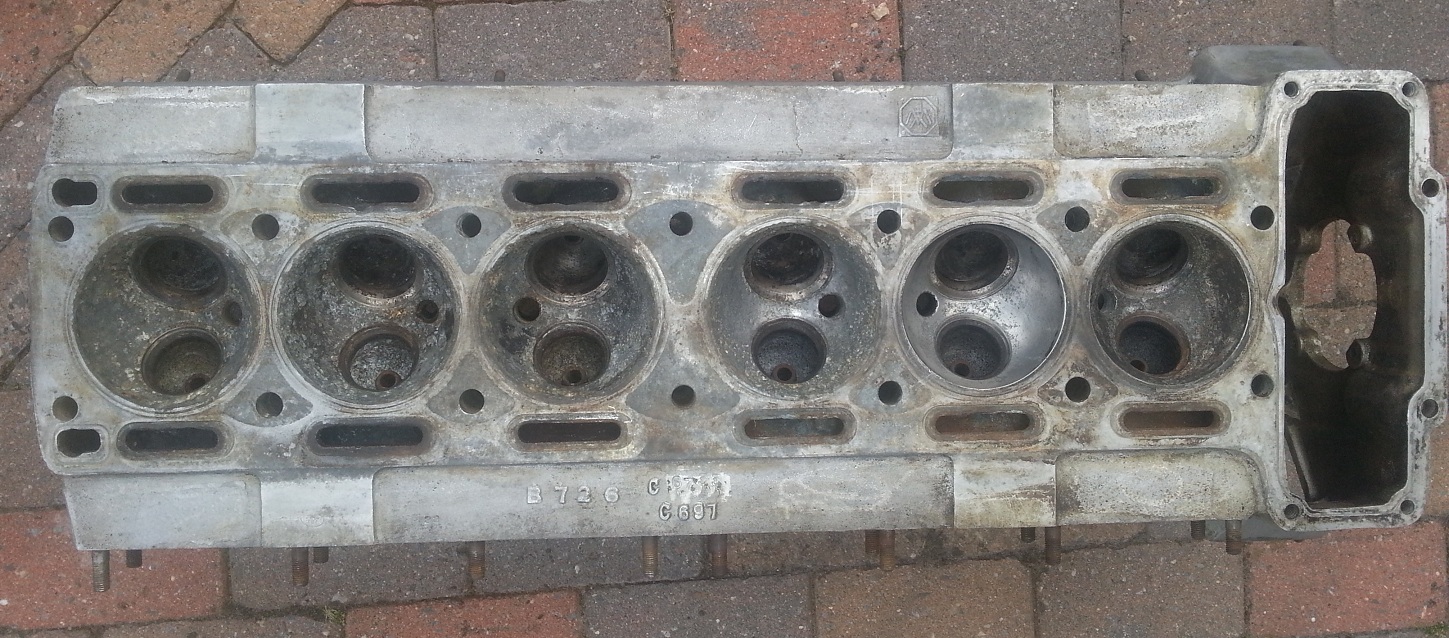
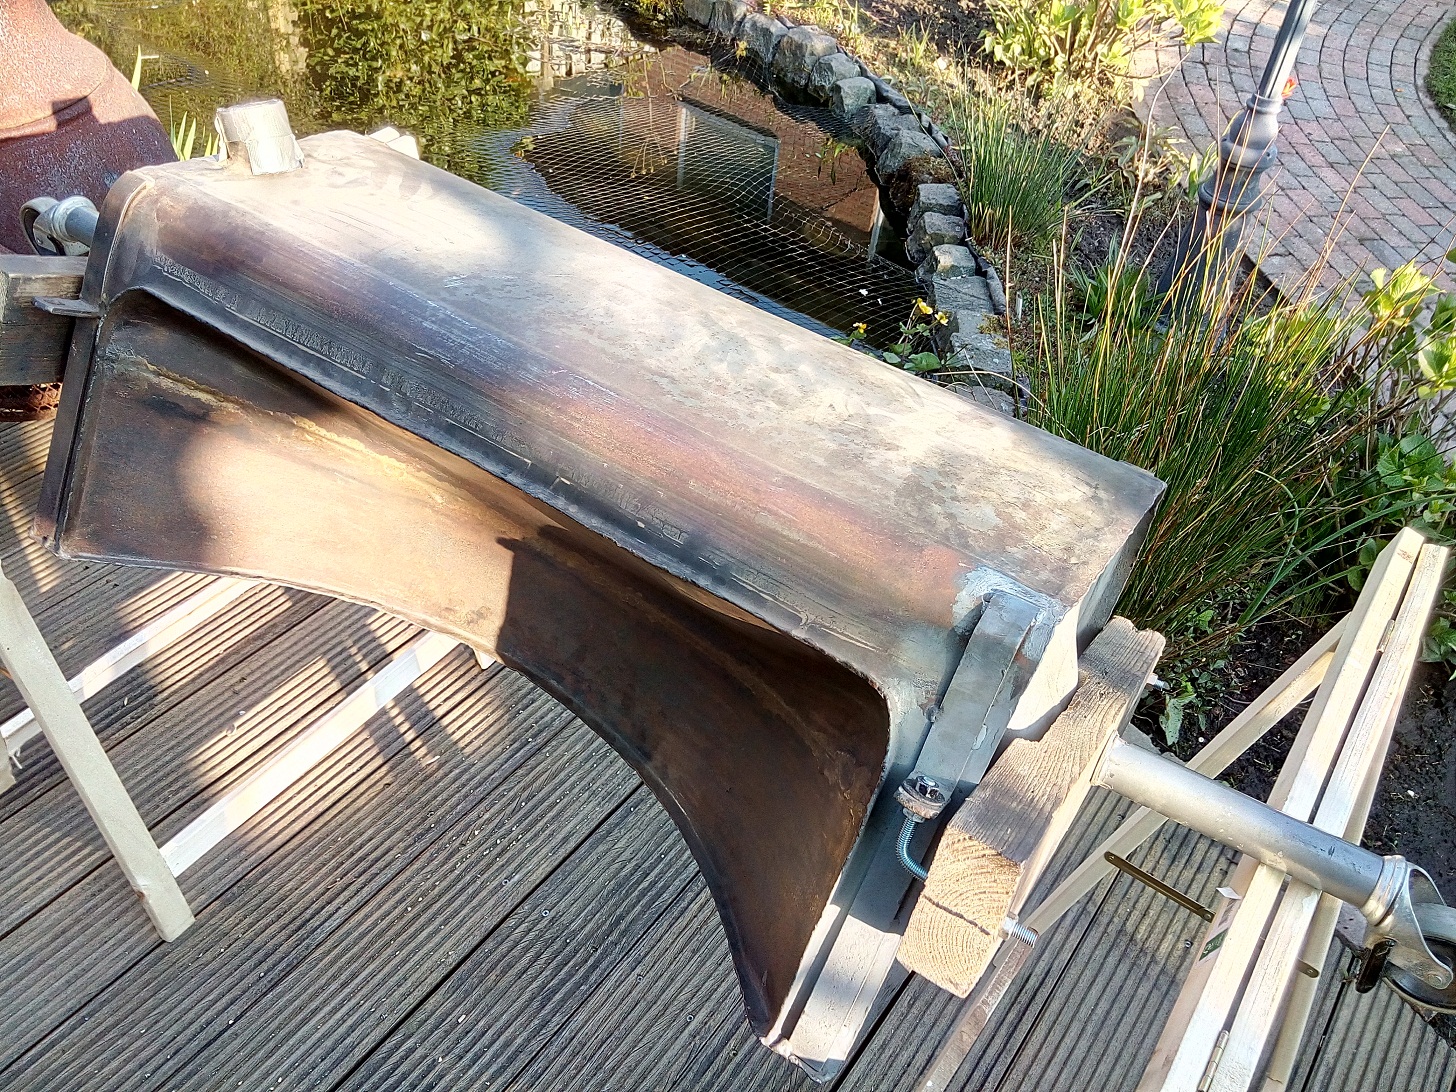
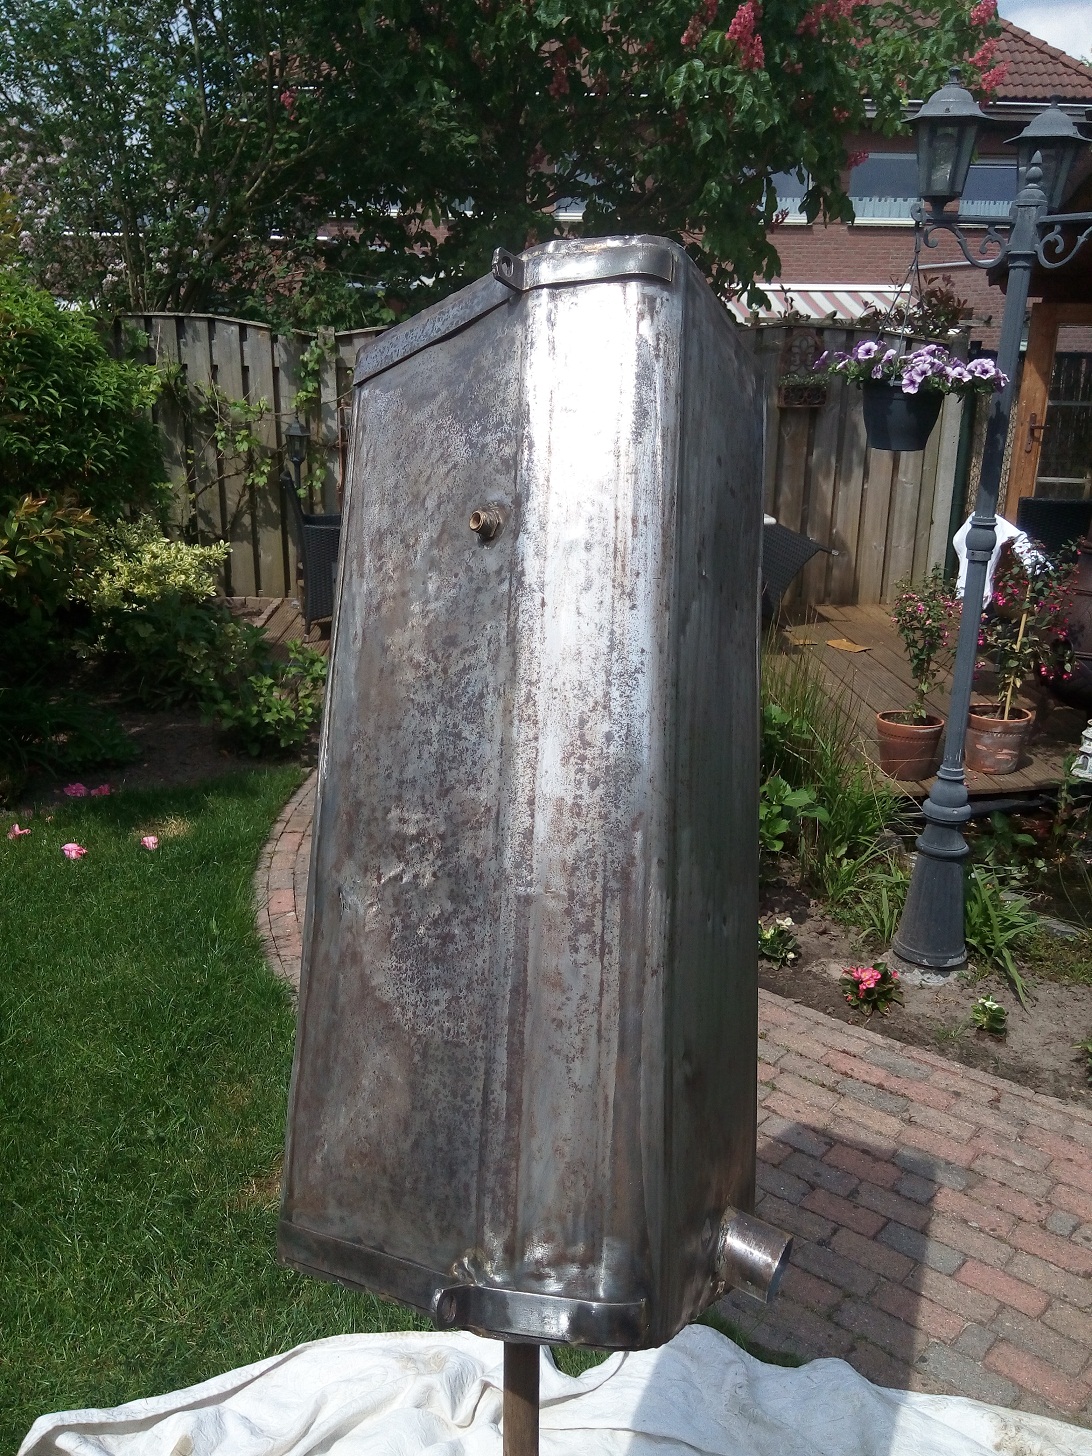
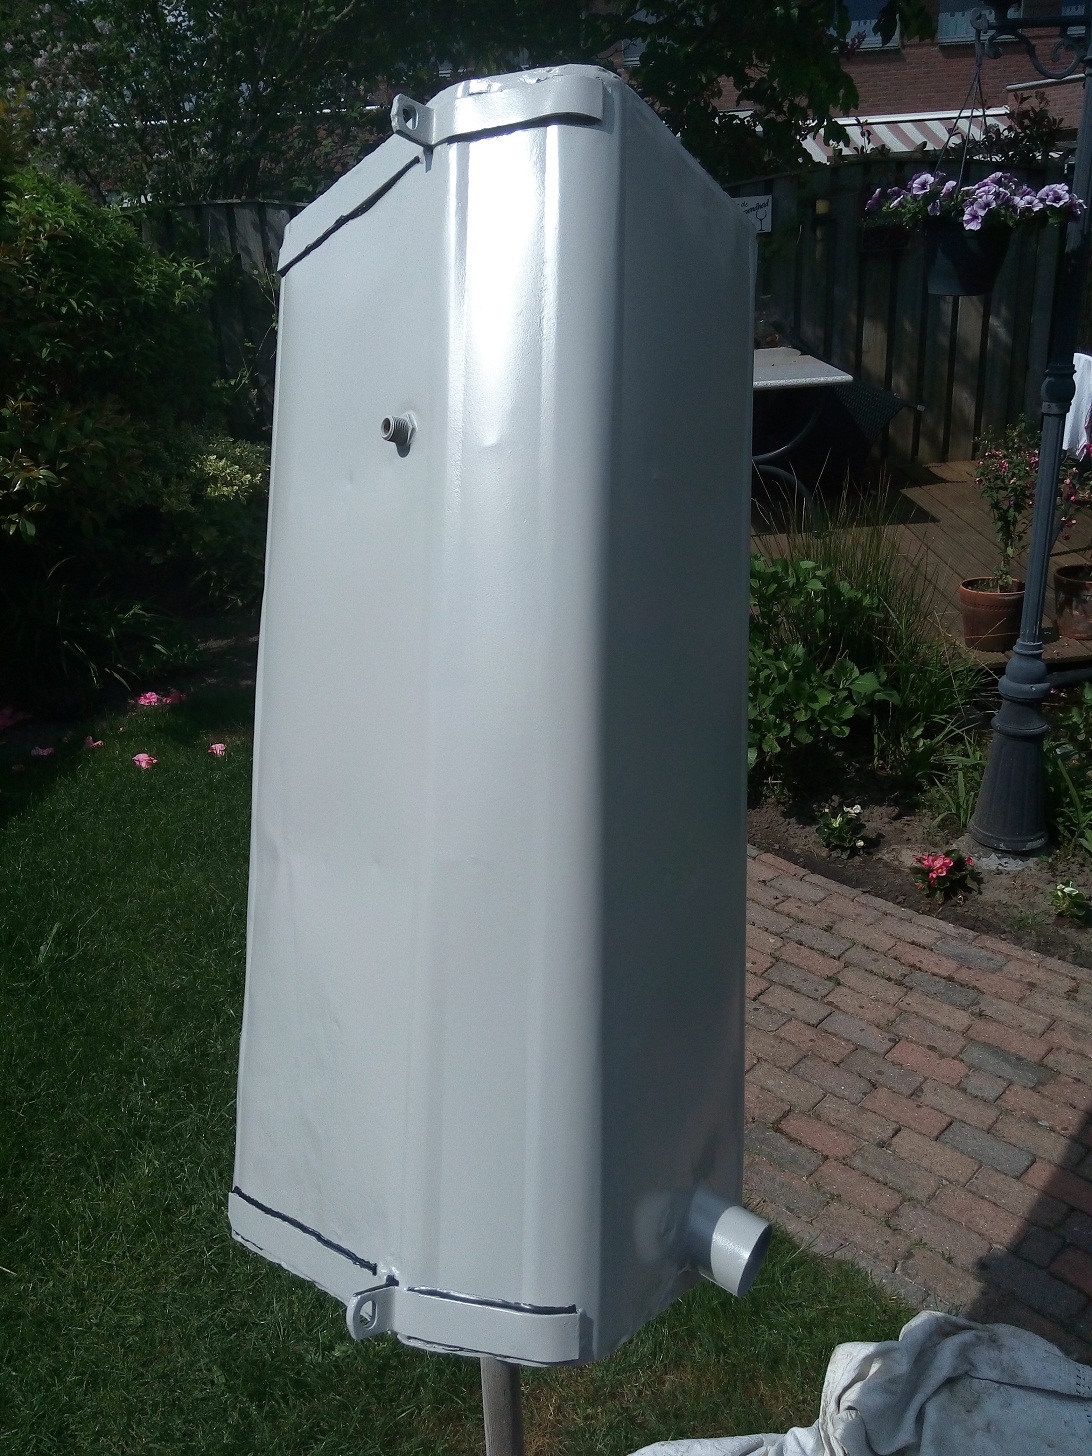
The Inlet manifold on the XK140 head was damaged by corrosion, but in the mean time I found a good replacement on the internet.

EngineInletDirty


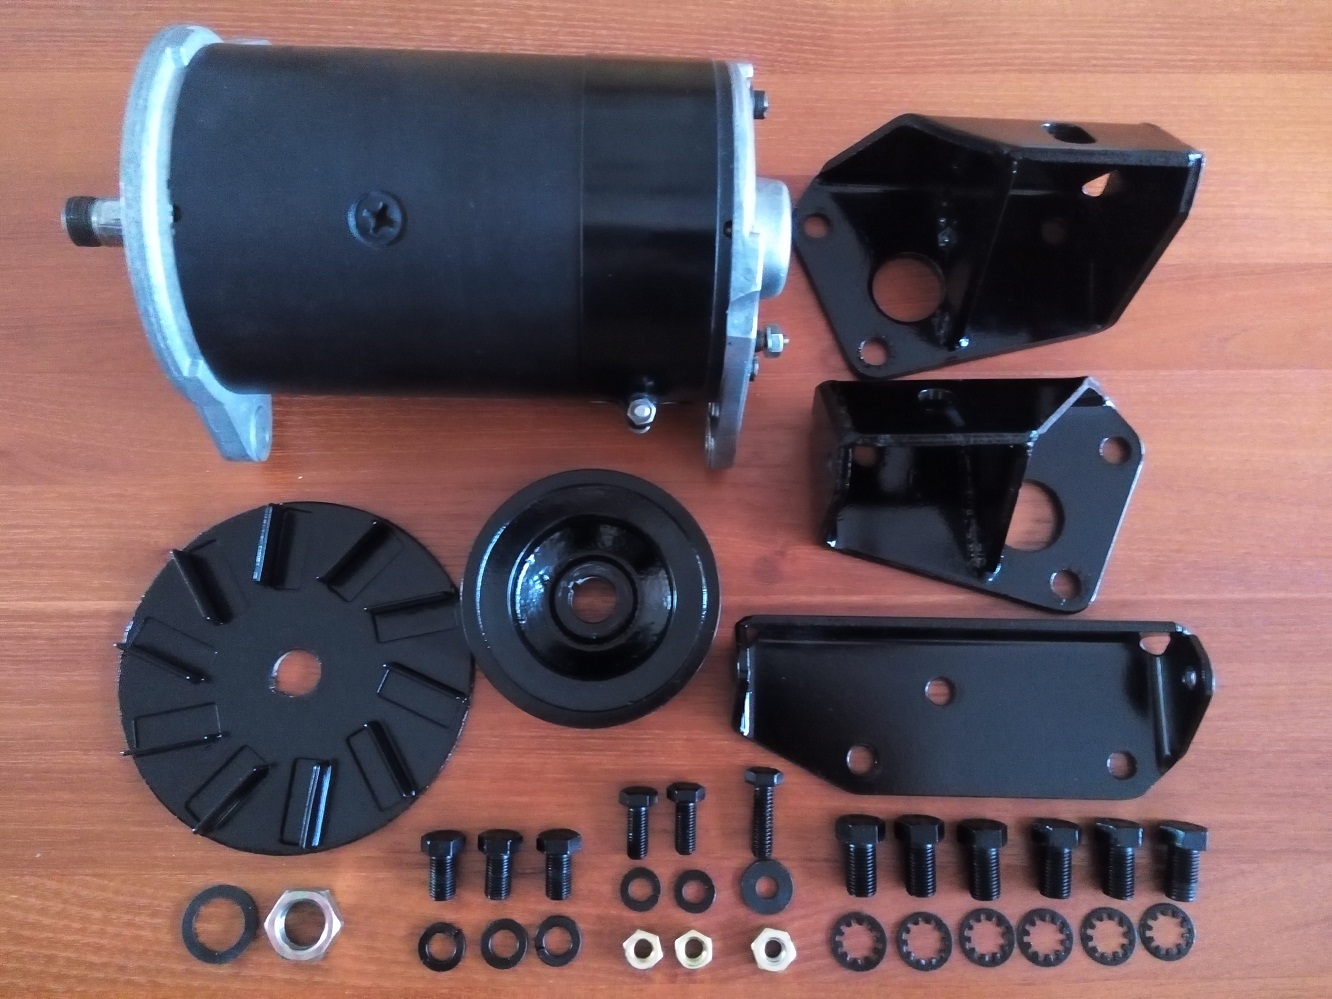
The shown fan blades are suitable for a XK120 luckily the other engine has a XK140 fan blades mounted so that one will be used instead.

Both engines where not able to turn around freely, so the 46 years of sitting still, has not been good for the overall condition. Was the engine stalled at some time, there is only one way to find out.

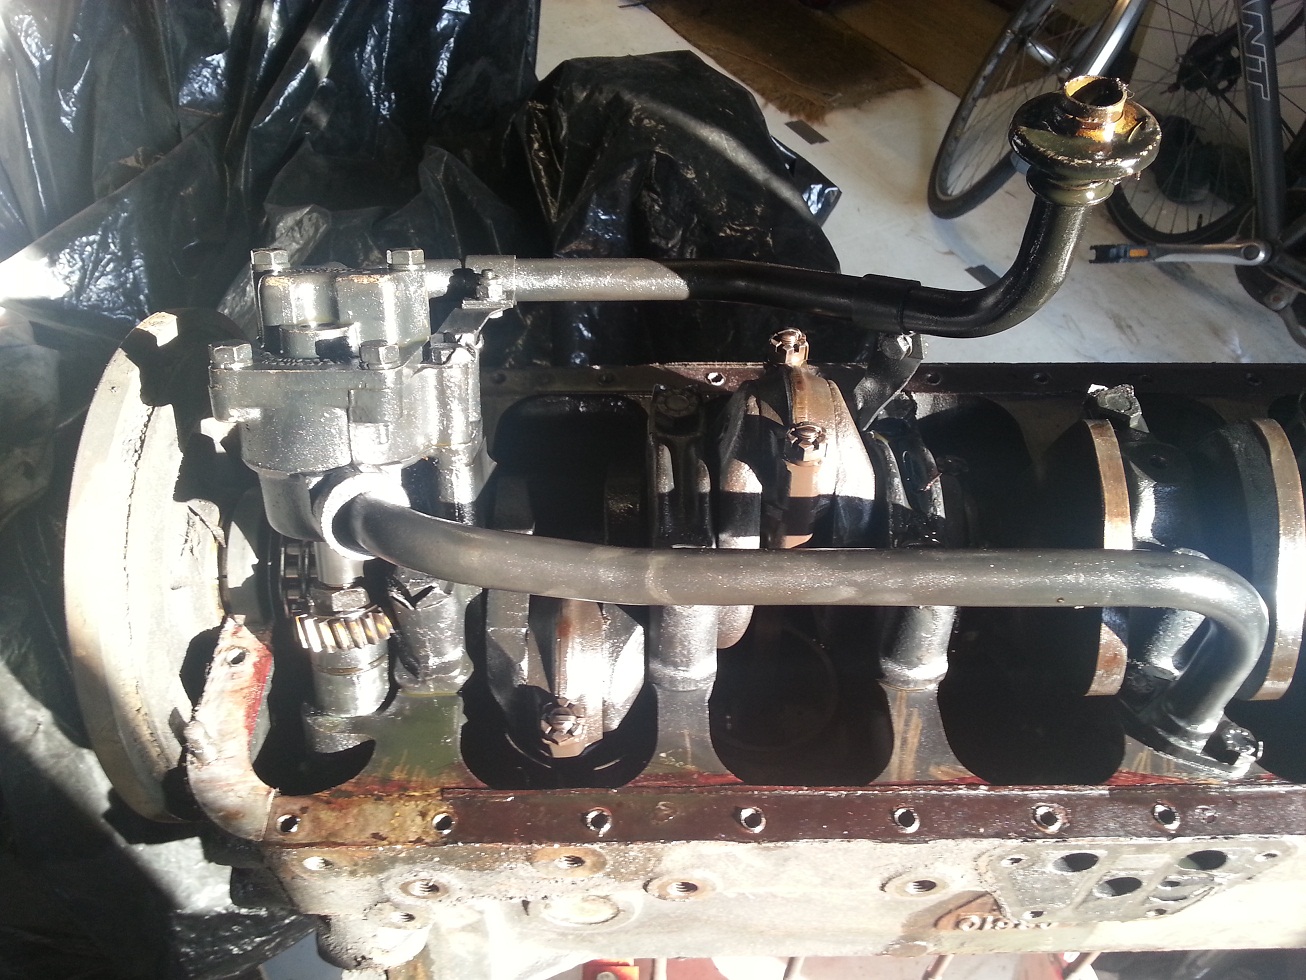
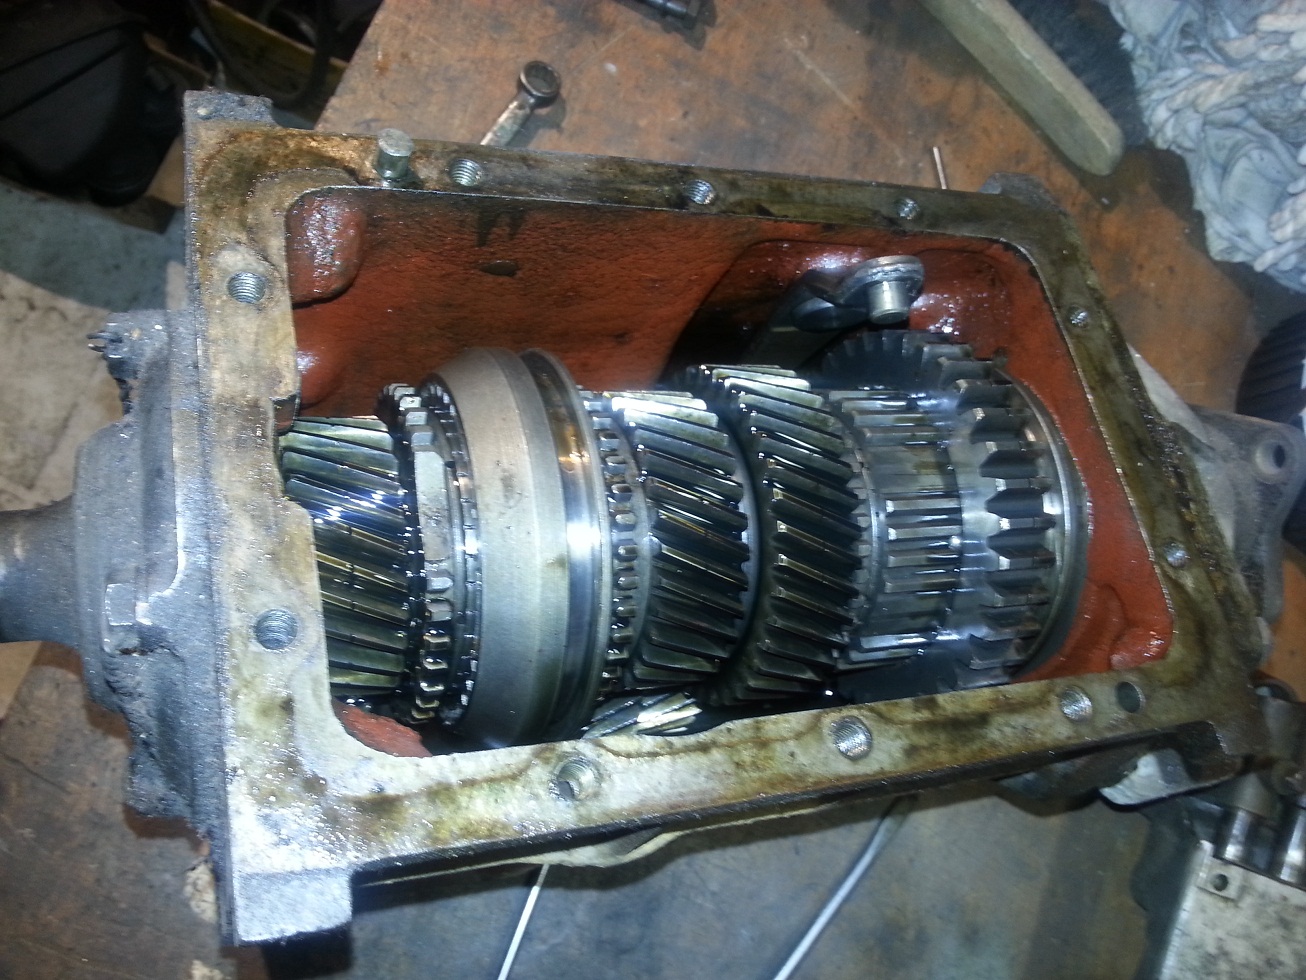
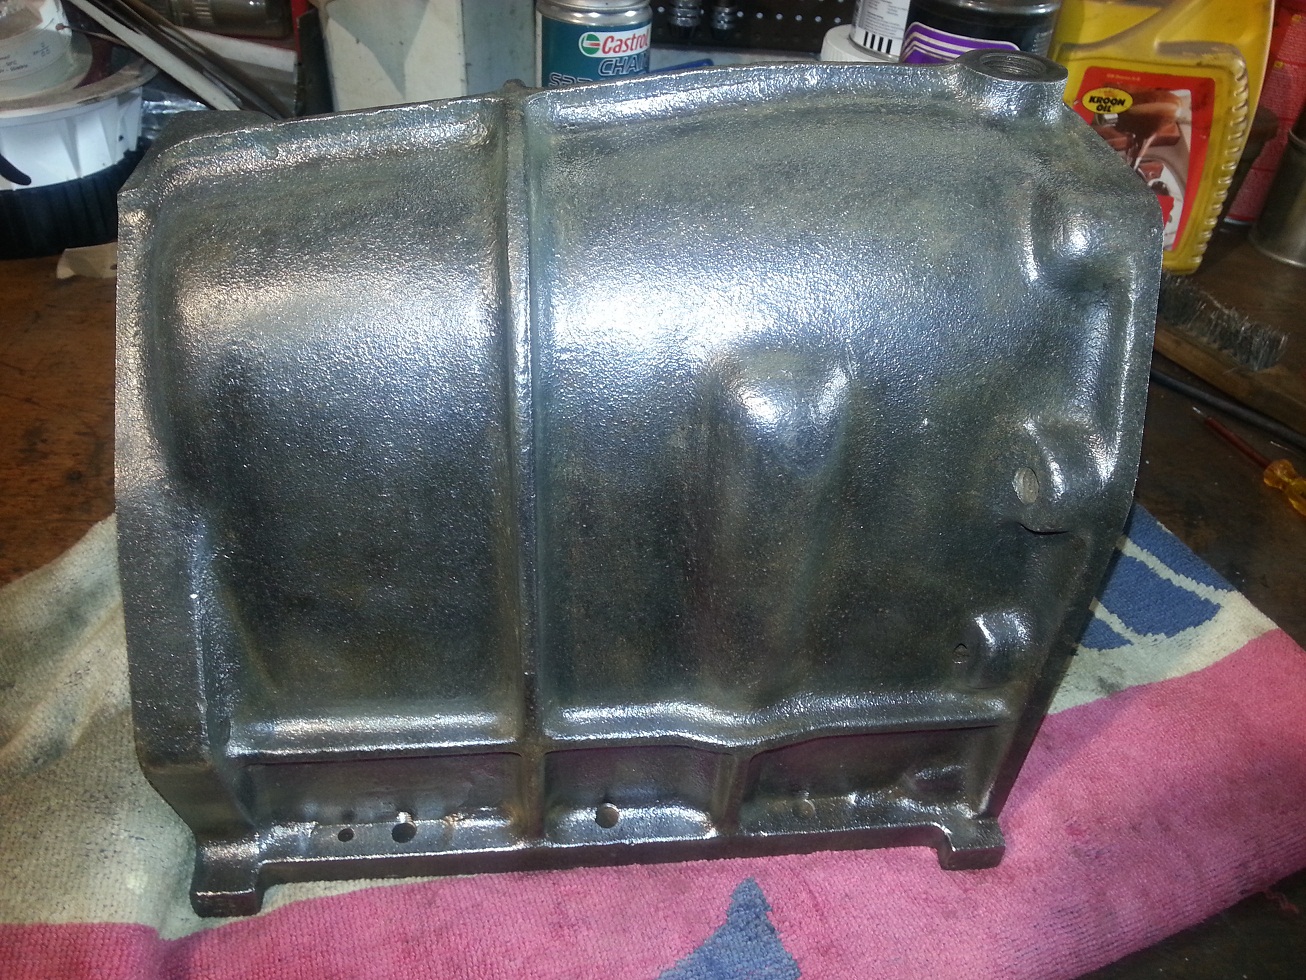
After removal of the oil sump the internals of the engine looked pretty normal. No broken crankshaft or broken connecting rods or other visible damage.

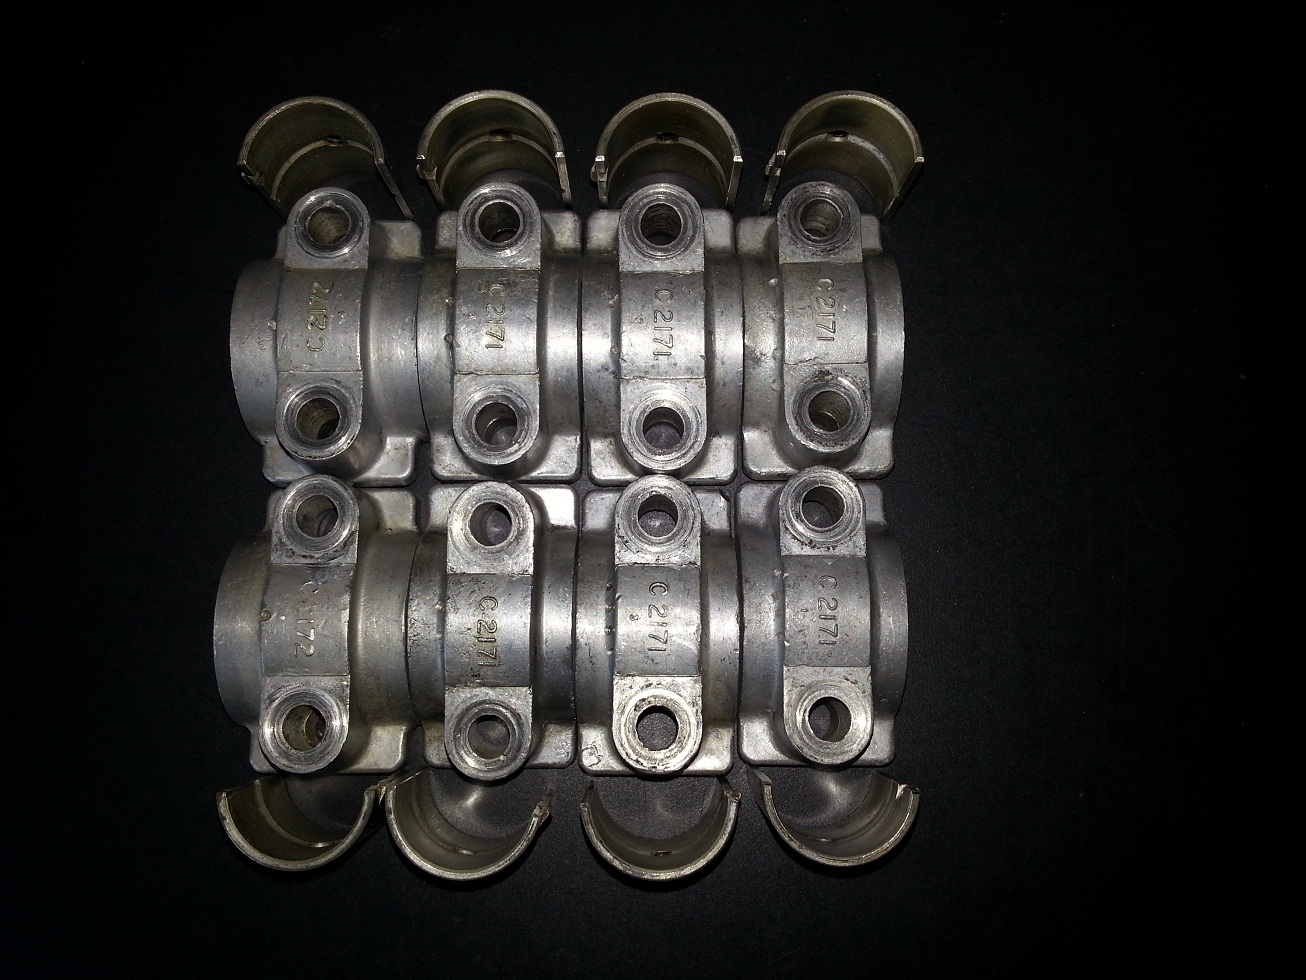
Remark: Label all bearing cap so they can be mounted on the exact same location and orientation. (In my case all caps where already marked with a unique id and number)

CrankshaftDirty

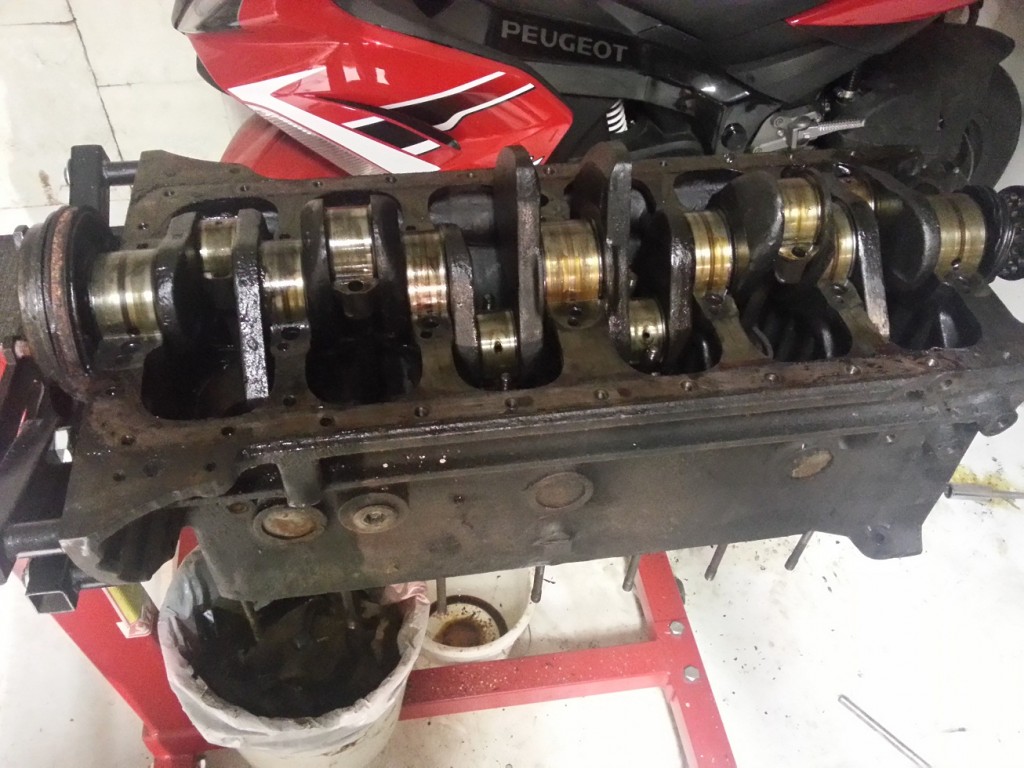
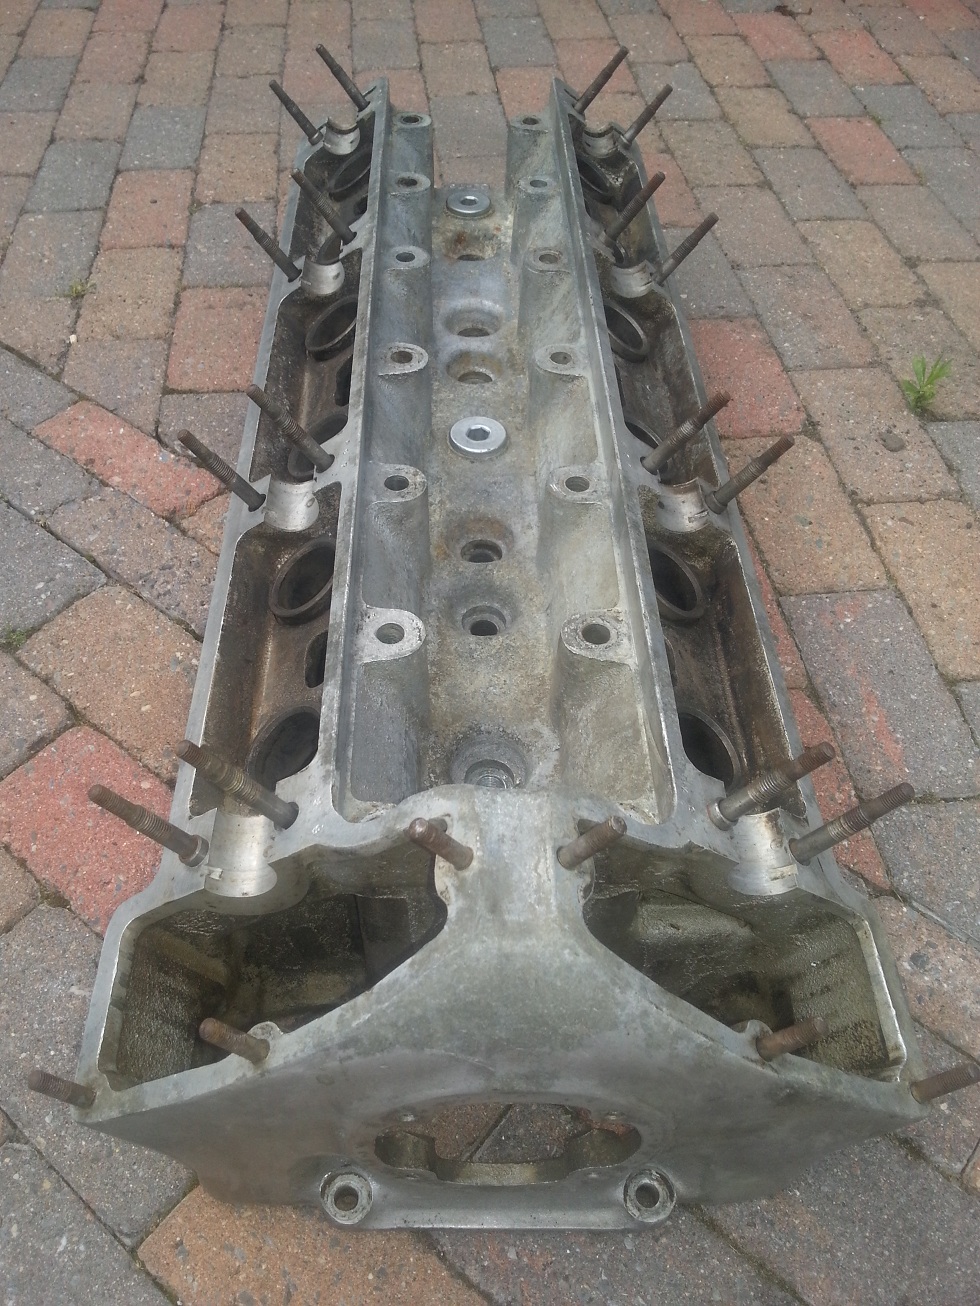
XK140 block without bearing caps


OilPumpDirty

Oil pump with connection pipes

After everything is disassembled and thoroughly cleaned I started with the the removal of cylinder head. Still searching for the cause of the not freely turning engine.

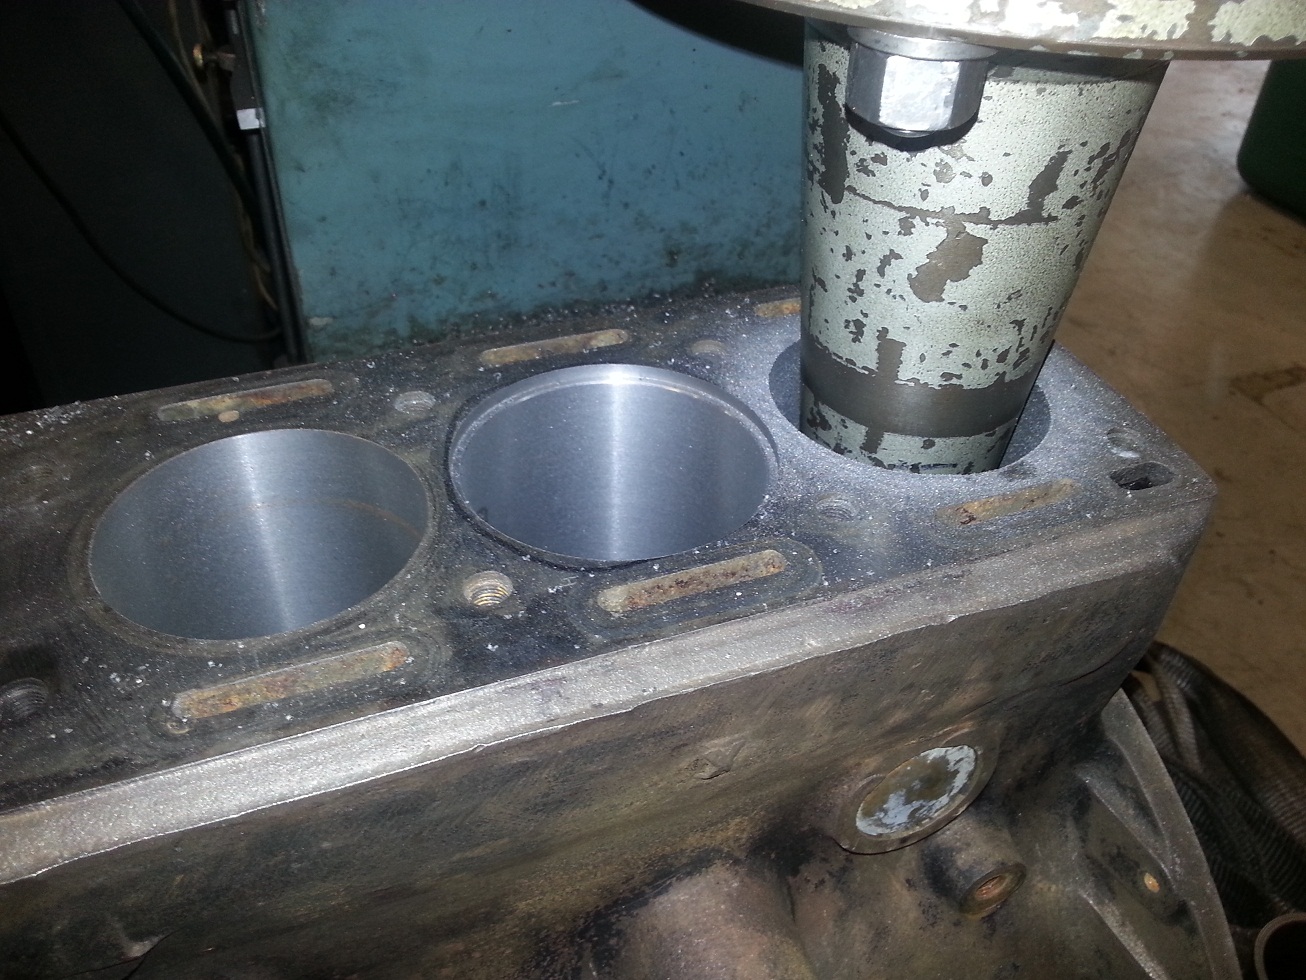
When the cylinders and pistons where visible, after the head was removed, it was all clear. Two cylinders where completely filled with lime, rust and dirt. After this was removed it was visible that one cylinder was badly damaged.
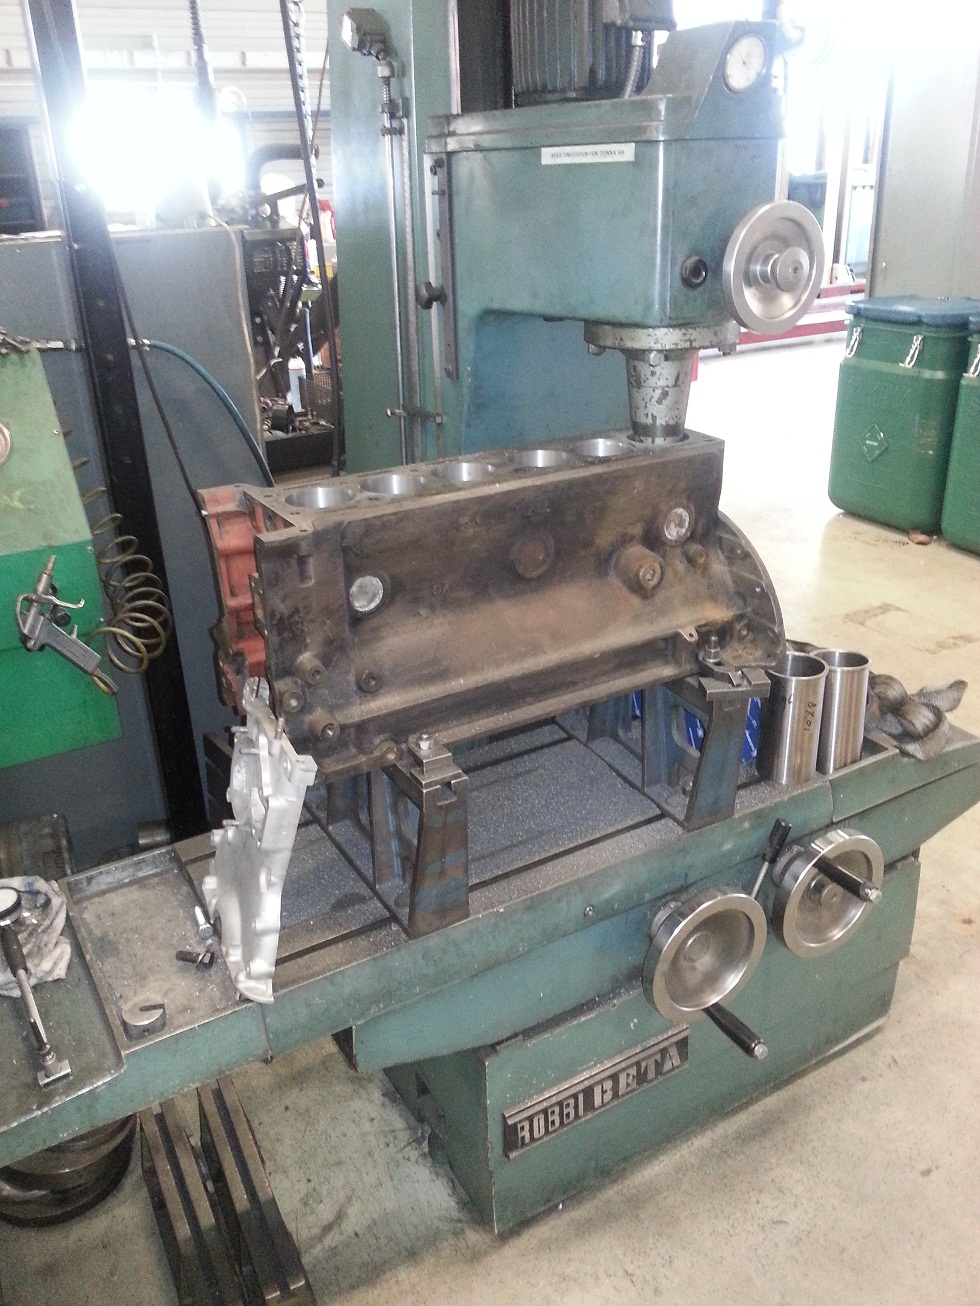
After measuring the diameter I found out that all cylinders where still standard with about 6/1000″ of wear.

Most probably the cylinder has to be drilled two sizes bigger +0.020 due to wear and corrosion damage.

Although the bearing caps has a unique id and number (stamped in the block and bearing caps) someone also made some unnecessary identification with a  center punch (one has been marked wrongly!).

CamShaftCapsCleanXk140

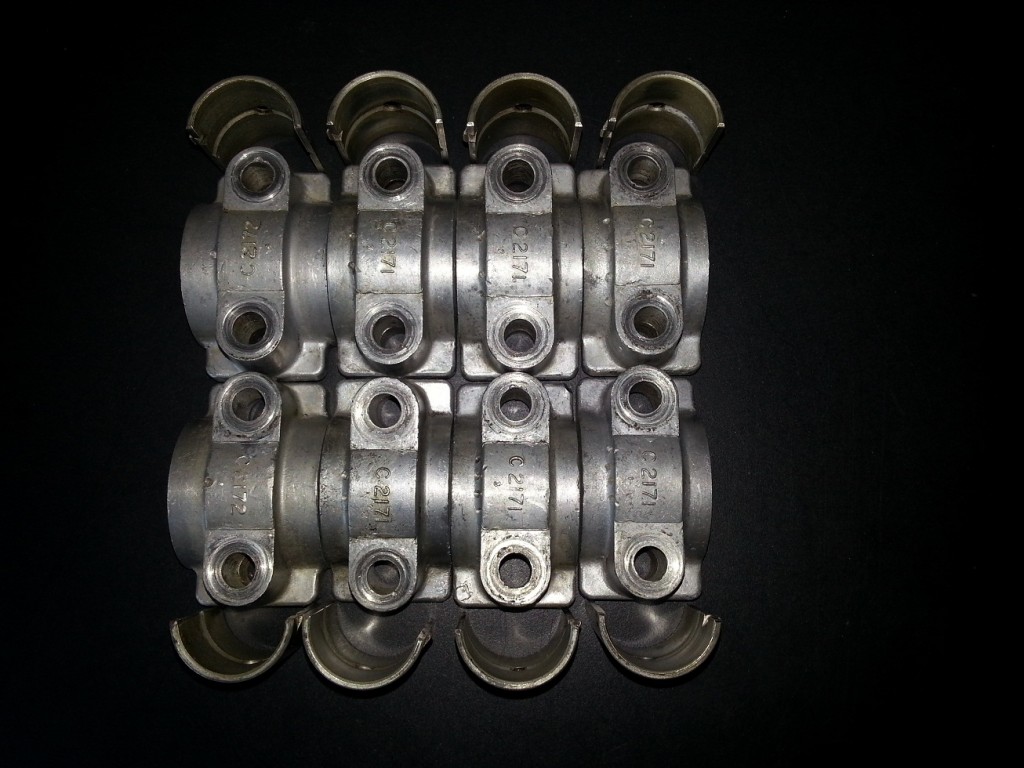
Cleaned cam shaft bearing caps


 Posted by at 19:54
aug 292014
 

Today I brought the cylinder-head and cylinder-block to “Rombouts revisie” in goirle.

The measured clearance:

  • Crankshaft STD with 15/100 mm clearance
  • Inlet Camshaft STD with no visible play
  • Outlet Camshaft STD with no visible play
  • Piston 1 STD with 15/100 mm clearance
  • Piston 2 STD with 15/100 mm clearance
  • Piston 3 STD with 15/100 mm clearance
  • Piston 4 STD with 15/100 mm clearance
  • Piston 5 STD with 15/100 mm clearance (after drilling to 75/100 mm still corrosion visable)
  • Piston 6 STD with 25/100 mm clearance (after drilling to 50/100 mm still corrosion visable)
  • To match play on the valve guides
  • Valve seats are worn and will be replaced by unleaded fuel types

.010″ = 10/1000″ = 0,25 mm = 25/100 mm
.020″ = 20/1000″ = 0,50 mm = 50/100 mm

Engine Drilling Machinery Engine Drilling Detail

Before the actual revision started they executed a cylinder head water pressure test to discover possible water leakage. (Due to the visible corrosion in the cylinder head) The conclusion was that it already started to leak inside combustion chamber 5 at a very low water pressure level. The advise was to look for a different cylinder head due to the high corrosion level in combustion chamber 4, 5 and 6. So I brought my XK120 head for the same test and although the water channels where no so good, the combustion chambers where much much better. Because the head between the XK120 and XK140 are technically equal (except for the number stamped into the casting) I decided to take the XK120 head.

The valves from both heads (24 in total) are not usable anymore because;

  • 10 pieces are damaged by corrosion
  • 7 pieces are shortened to compensate the excessive valve seat wear.

Work for the revision company:

  • Re-sleeve cylinder wall 5 and 6
  • Drill all cylinders to +020
  • Flattening of the cylinder block
  • Water pressure tests on two different XK cylinder heads
  • Replace all valve seats with unleaded fuel types
  • Replace all valve guides
  • Flattening of the cylinder head
  • Welding all damaged water channels in the cylinder head (12 x)
    The discoloring around the water channels shows what has been welded

Cylinderhead Detail Cylinderhead

In the mean time I ordered the following new parts:

  • 6 Pistons oversize +20
  • 6 inlet valves
  • 6 exhaust valves
  • Crankshaft bearing
  • Thrust bearing
  • Big end bearings
  • Camshaft bearing
  • Bottom gasket set (including oil seals)
  • Top gasket set (including oil seals)

All preparation has been finished (10 october 2014), the assembly process can now be started.

 Posted by at 14:13
mei 262014
 

When I purchased the car, it was possible to buy a second spare engine.
The engine which belongs to the car consists of a XK120 block and XK140 head.
The spare engine consists of  a XK140 block and XK120 head.

To be able to build a complete XK140 engine I decided to buy the extra engine for Euro 750.

EnginesBuy


Engine 1:

  • Head G8877-7
  • Block W1800-8


Engine 2:

  • Head W7707-8
  • Block G9274-8S


Now after almost 5 year I started to disassemble both engines and found, due to 46 year of stagnation,  the following issues:

  • Sparkplug snapped of
  • Thread for sparkplug gone
  • Combustion-chambers damaged due to corrosion
  • Cylinder wear 
  • Pistons stuck in cilinder
  • Inlet and exhaust valves/seats damaged due to corrosion
  • Wrong type of camshafts mounted in the XK140 head (C13080 and C2444, required c5717 and c5718)

Hopefully it will be possible to combine the good parts from both engines and try to find the missing parts.

 Posted by at 20:10
aug 212011
 

Below a picture from the chassis before the previous owner started disassembling it.

ChassisOrg

After all small parts where removed I could start with removing all dirt and grease which was present in large quantities. This is for all classic cars, especially for English cars, the reason why the chassis could be kept in good shape after 50 years.
I found a strange number (225) on the right side of the chassis, nearby the fuel pump. Until today I haven’d found an explanation for these marks. Because they look authentic I decided to leave them where the are.

After I protected all threads and chassis numbers with dummy screws the chassis could be delivered at sand blasting company.

ChassisBlasted

The chassis looked as new after it was sand blasted, there are only two places with minimal rust(on both side where the battery was located). I sandpapered the whole chassis before I sprayed it in epoxy primer. After the paint was full dried I filled up all seams with 3M seams kit.

ChassisPrimer

The last step for the restoration of the chassis was spraying it into two layers of black chassis paint.

ChassisPaint

 Posted by at 15:26
mei 172016
 

After I bought the car I discovered that the fuel tank was missing. This proves that, even for a big part as a fuel tank, as already mentioned earlier, it is very difficult to see a car is complete.

A friend of mine, also the owner of a XK140 FHC, has one extra fuel tank in his pile of car parts. This tank is original but has two small issues:

  • Small dent in the underside of the tank nearby the filter element
  • Small hole just underneath the mounting bracket (grey area on the right side)

To make the cleaning and sealing process more convenient, I connected two extension on which the tank can turn freely.

hdr

Fuel tank during the internal cleaning process

After both issues where solved the tank is ready for the internal cleaning and coating in the following steps.

  • Turn the fuel tank, backwards and forwards, filled with small sharp stones
  • Rinse thoroughly  with clean water to remove dust residue.
  • Fill the fuel tank with “Metal Prep 1/4 gallon” from POR15 and rotate the tank for one hour.
  • Remove the Metal Prep remaining and rinse thoroughly  with clean water to remove. (I used a pressure washer)
  • Let the tank dry completely (Outside in the sun)
  • Fill the fuel tank with  “Fuel Tank Sealer 1/4 gallon” from POR15 and rotate the tank for one hour.
  • Drain the fuel tank for one hour to remove excess sealer from the tank.
TankCleaned

Tank after removing the rust on the outside

With sandpaper the outside of the tank is cleaned and prepared for painting.

TankSealed

Fuel tank painted and seams sealer aplied

After the tank is painted (epoxy primer) the outside seams are sealed (3M body sealer).
Now the “Body shuts spray” from 3M can be aplied. To be able to clean the tank easily a last layer of satin black paint is applied.

hdr

All fuel tank parts needed for rebuilding and mounting

Now only the felt must be mounted (On the fuel tank and the chassis) and the rolling chassis is almost finished.

FuelTankFinished

Fuel tank mounted onto the chassis 

 Posted by at 21:16
dec 202014
 

GearboxInternalAfter removing the gearbox cover I was pleased to see that there was still 0,5 liter of oil inside. All the gears looks still great.

The bearing of the incoming axle was blocked for some reason but I already planned to replace all bearing anyway.

The needles bearings where also not so good but the bearing surface was still in good shape.

After all internals where cleaned, checked and stored I started with cleaning the gearbox cover.

I will leave the gearbox cover as it is for the time being. I don’t want to disassemble to much at the same time be able to assemble everything as it should.

Gearbox Cleaned Gearbox Painted


After the outside gearbox cover was decreased and all rust removed, it could be painted epoxy primer and several layers of black paint.

Gearbox Parts

All separate parts used to rebuild the gearbox without cover

GearboxInternalFinished

Gearbox (without cover) mounted


 Posted by at 17:27